Windows:
nbtstat -a ipaddress
Linux:
nmblookup -A ipaddress


Settings -> Preferences... -> Language Menu/Tab Settings -> Tab Settings (group) -> Replace by space
Settings -> Preference -> Edit Components (tab) -> Tab Setting (group) -> Replace by space
- Mihir Patel


It seems like everybody uses the free PuTTY client for accessing SSH from Windows, but the lack of a tabbed interface has kept me using the commercial SecureCRT application for years… until now.
With the PuTTY Connection Manager you can not only use tabs, but also wrap PuTTY in a slick interface. The underlying client is still the same putty.exe that you are used to… in fact the application doesn’t even come bundled with it.
The first time you launch the application you’ll be asked to enter the location to your copy of PuTTY.

And finally, a tabbed version of PuTTY!

The connection manager can be docked to the side by using the little pushpin button.

Right-clicking on a tab or using the Tools menu will allow you to get to the PuTTY menu

In the configuration dialog you can specify a bunch of options including an automatic login macro or passing command line parameters to putty.
You can either click the configuration button above, or choose PuTTY Configuration from the tools menu.

Which brings up the PuTTY Configuration dialog for the actual putty.exe underlying application.

There’s a lot more features to this application that I haven’t gotten to yet… you can even change the theme.
Download PuTTY Connection Manager from puttycm.free.fr
Ref: http://www.howtogeek.com/howto/the-geek-blog/get-tabs-for-your-putty/

What Regular Expression?
A regular expression is a pattern that can match various text strings, used for validations.
Where and when to use Regular Expression?
It can be used in the programming languages which supports or has regular expression class as in built or it supports third party regular expression libraries.
Regular expressions can be used to valid different type of data without increase the code with if and case conditions. A number of if conditions can be omitted with single line of regular expression checking.
Benefits of Regular Expression:
The following are benefits (not all included) of use of Regular Expression.
a) # line of code can be reduced.
b) Speed Coding.
c) Easy maintenance (you don’t need to change if validation criteria changes, just check the regular expression string).
d) Easy to understand (you don’t need to understand the programmer logic on large if statements and case statements).
Elements of Regular Expression:
Here are the basic elements of regular expression characters/literals, which can be used to build big regular expressions:
^ ---->literal matches the start of a LINE of input
$ ---->literal matches the end of a LINE of input
. ----> Any character (except \n newline)
{...}----> Explicit quantifier notation.
[...] ---->Explicit set of characters to match.
(...) ---->Logical grouping of part of an expression.
* ---->0 or more of previous expression.
+ ---->1 or more of previous expression.
? ---->0 or 1 of previous expression; also forces minimal matching when an expression might match several strings within a search string.
\ ---->Preceding one of the above, it makes it a literal instead of a special character. Preceding a special matching character, see below.
\w ----> matches any word character, equivalent to [a-zA-Z0-9]
\W ----> matches any non word character, equivalent to [^a-zA-Z0-9].
\s ----> matches any white space character, equivalent to [\f\n\r\v]
\S----> matches any non-white space characters, equivalent to [^\f\n\r\v]
\d ----> matches any decimal digits, equivalent to [0-9]
\D----> matches any non-digit characters, equivalent to [^0-9]
\a ----> Matches a bell (alarm) \u0007.
\b ----> Matches a backspace \u0008 if in a [] character class; otherwise, see the note following this table.
\t ---->Matches a tab \u0009.
\r ---->Matches a carriage return \u000D.
\v ---->Matches a vertical tab \u000B.
\f ---->Matches a form feed \u000C.
\n ---->Matches a new line \u000A.
\e ---->Matches an escape \u001B
$number ----> Substitutes the last substring matched by group number number (decimal).
${name} ----> Substitutes the last substring matched by a (? ) group.
$$ ----> Substitutes a single "$" literal.
$& ----> Substitutes a copy of the entire match itself.
$` ----> Substitutes all the text of the input string before the match.
$' ----> Substitutes all the text of the input string after the match.
$+ ----> Substitutes the last group captured.
$_ ----> Substitutes the entire input string.
(?(expression)yes|no) ----> Matches yes part if expression matches and no part will be ommited.
Simple Example:
Let us start with small example, taking integer values:
When we are talking about integer, it always has fixed series, i.e. 0 to 9 and we will use the same to write this regular expression in steps.
a) Regular expression starts with “^”
b) As we are using set of characters to be validated, we can use [].
c) So the expression will become “^[1234567890]”
d) As the series is continues we can go for “-“ which gives us to reduce the length of the expression. It becomes “^[0-9]”
e) This will work only for one digit and to make it to work for n number of digits, we can use “*”, now expression becomes “^[0-9]*”
f) As with the starting ending of the expression should be done with “$”, so the final expression becomes “^[0-9]*$”
Note: Double quotes are not part of expression; I used it just to differentiate between the sentences.
Is this the way you need to write:
This is one of the way you can write regular expression and depending on the requirements and personal expertise, regular expression could be compressed much shorter, for example above regular expression could be reduced as.
a) Regular expression starts with “^”
b) As we are checking for the digits, there is a special character to check for digits “\d”
c) And digits can follow digits , we use “*”
d) As expression ends with “$”, the final regular expression will become
"^\d*$”
Digits can be validated with different ways of regular expressions:
1) ^[1234567890]*$
2) ^[0-9]*$
3) ^\d*$
Which one to choose?
Every one of above expressions will work in the same way, choose the way you are comfort, it is always recommended to have a smaller and self expressive and understandable, as these will effect when you write big regular expression.
Example on exclude options:
There are many situation which demands us to exclude only certain portion or certain characters,
Eg: a) Take all alpha numeric and special symbols except “&”
b) Take all digits except “7”
then we cannot prepare a big list which includes all instead we use the symbol of all and exclude the characters / symbols which need to be validated.
Eg: “^\w[^&]*$” is the solution to take all alpha numeric and special symbols except “&”.
Other Examples:
a) There should not be “1” as first digit,?
^[^1]\d*$ ? this will exclude 1 as first digit.
b) There should not be “1” at any place?
^\d[^1]*$ ? this will exclude the 1 at any place in the sequence.
Note: Here ^ operator is used not only to start the string but also used to negate the values.
Testing of Regular expression:
There are several ways of testing this
a) You can write a windows based program.
b) You can write a web based application.
c) You can even write a service based application.
Windows base sample code:
Here are steps which will be used for regular expression checking in dotNet:
a) Use System.Text.RegularExpression.Regex to include the Regex class.
b) Create an Regex object as follows:
Regex regDollar= new System.Text.RegularExpressions.Regex("^[0-9]*$ ");
c) Call the IsMatch(string object) of the Regex call, which will return true or flase.
d) Depending on the return state you can decide whether passed string is valid for regular expression or not.]
Here is the snap shot code as function:
Public boolean IsValid(string regexpObj, string passedString)
{
//This method is direct method without any exceptional throwing..
Regex regDollar= new System.Text.RegularExpressions.Regex(regexpObj);
return regDollar.IsMatch(passedString);
}
With minor changes to the above function it can be used in windows or webbased or even as a service.
Another way -- Online checking:
At last if you are fed up with above and you have internet connection and you don’t have time to write sample, use the following link to test online
http://www.regexplib.com/RETester.aspx
Ref: http://geekswithblogs.net/brcraju/articles/235.aspx, Raju
There is no doubt that Joomla! is one of the best content management system (CMS) in the world. It has a large set of extensions to meet almost any type of application need ranging from content management, photo gallery, multimedia streaming to e-commerce and social networking. It has great flexibility in changing designs and customizing the code. With Joomla, you can build any kind of website and dynamic web application. For example, this step-by-step tutorial by Suhreed Sarcar describes how to build custom form applications in Joomla! using CK Forms component without delving into any PHP code. (For more resources on Joomla!, see here.) Dynamic web application often means database at the back-end. It not only takes data from the database and shows, but also collects data from the visitors. For example, you want to add a quick survey into your Joomla! Site. Instead of searching for different extensions for survey forms, you can quickly build one survey form using an extension named CK Forms. This extensions is freely available for download athttp://ckforms.cookex.eu/download/download.php. For building a quick survey, follow the steps below:Add a quick survey form to your Joomla site
 | Keep your web site up-to-date and maintain content and users with ease
|
(For more resources on Joomla!, see here.) Now it's time to add fields to the form. For adding the fields to a form, follow the steps below:Adding fields to the form
Type | Description |
Text | This creates a text field on the form where single line texts can be typed by the users. You can specify length of the field. This creates <input type=text ... /> HTML markup. Text field types in CK Forms can be any of the following sub-types:
|
Hidden | This creates a hidden field where some information can be embedded with the form. It is equivalent to <input type=hidden ... /> markup. |
Textarea | This creates a field where users can type multiple lines of text. This is equivalent to <textarea></textarea> markup. |
Checkbox | Checkboxes are for selecting one or more options at a time. This is equivalent to <input type="checkbox" name="..." value="..." />markup. |
Radio button | Radio button are for presenting options those are mutually exclusive. For example, sex of a person can either be Male or Female. In that case, you should use radio buttons. This is equivalent to <input type="radio" name="..." value="..." /> markup. |
Select | This type of fields creates drop down list or select list from where users can select one or more than one options. This is similar to following code block: <select> |
File Upload | This creates a form control that allows uploading a file to web server. It is equivalent to <input type=”file” name=”file1” /> markup. |
Button | This creates buttons, such as Submit or Reset. This is equivalent to<input type=”button” name=”...” /> markup. |
Field separator | This creates a separator between two fields. It is simply a space or horizontal line. |
Now we have finished adding the buttons to the form. It's time to add this form in front-end menu so that users can click on that, fill in and submit the form.
 | Solve real world Joomla! 1.5 development problems with over 130 simple but incredibly useful recipes
|
(For more resources on Joomla!, see here.) For adding a menu item linking to the form we have created, follow the steps below: From the administration panel, click on Preview button on the upper right-hand side. That previews your site. You see Quick Survey menu item in Main Menu. Click on this menu item and you see your newly created form Quick Survey. It looks like the following screen shot. As you see, the date of birth field shows a calender icon besides it, taking your mouse pointer to this field you display a date selector. Sex and Marital Status fields are showing radio buttons. For the first, options are displayed in line, whereas for Marital Status, options are shown as list. E-mail address field looks like a simple text field, but when you type something in this field and move away from the field, the contents will be instantly validated. It will validate whether you have given an e-mail address or not, and show error message. Country field displays a drop down list with the names of countries we have added. Similarly, you also see a newsletter subscription checkbox. The textarea field we created is displayed with HTML Editor. If you like you can turn off this Visual HTML editor by clicking on Toggle editor button. Then we see, file upload field. Clicking on Browse button opens up file opening dialog from where users can select a file for uploading to Joomla! site. During form definition we have indicated that we want Captcha. You see the Captcha image and a box to type the image text. You can also refresh the Captcha code. As an administrator of a Joomla! Site you can easily see the data submitted through the form. For viewing the data submitted follow the steps below: For showing data in the front-end, follow the steps below: Users can now see all submitted data as a table. At this moment, you cannot selectively publish submitted data. With CK Forms component, you can create simple form applications that do not need multiple tables and complex relationships. As seen in this tutorial, you can easily add one page simple form on your Joomla! site without any coding. Besides the features covered in this tutorial, you can also do the following with CK Forms: There are many extensions available for Joomla! through which functionalities of a Joomla! Site can be enhanced. For building form applications, there are several extensions and CK Form is one of them for building simple forms in Joomla!. Using CK Forms extension you can easily add a custom form into Joomla! By which users can submit data to you. For doing this, you don't need any coding except using some wizards in the component. Ref : Suhreed Sarkar | January 2010 | Joomla! Content Management Open Source, http://www.packtpub.com/article/building-form-applications-in-joomla-using-ck-formsAdding menu item for the form
Previewing the Form
Viewing data submitted by the form
More things to do with CK Forms
Summary
 Waiting for Data
 Tracking Unknown or Not Verified
 Receiving Data

In Gmail POP
can be enabled , and here is how to set it up for Evolution.
Enable pop and set pop up in the way you prefer. (At least make
sure pop is enabled.)
Select Edit > Preferences > Mail Accounts
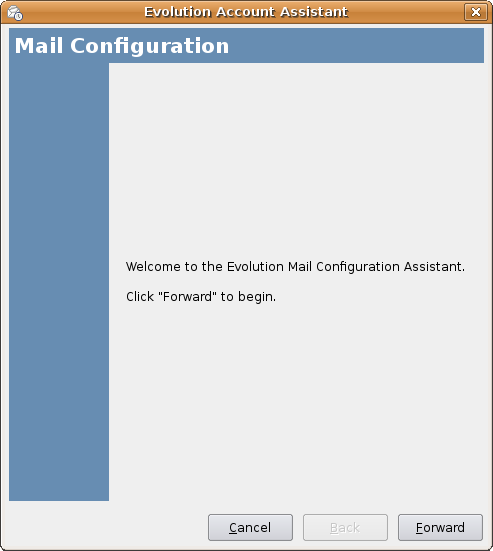
Select the Add Button > (Evolution Assistant Account starts.
If you use evolution for the first time this is where you begin.
Server type: POP
Server: pop.gmail.com
Username: username@gmail.com
Security > Drop-down menu > select SSL connection
Authenthication Type: password
Flag remember password if you wish
Select ok
Are all optional, fill in as you please.
Select Forward
Can be done in 2 ways:

SMTP
Server: smtp.gmail.com
Flag: server requires authentication
Use Secure Connection: SSL
Fill in Username: username@ gmail.com
Select OK
Done.
Now restart Evolution and see if it all works.
For more instructions (if needed) go to Gmail help Center
Used Evolution 2.9.92 on Ubuntu Feisty, wording and views might
be slightly vary on other Evolution versions.
Ref : Tuxicity, http://tuxicity.wordpress.com/2007/03/08/howto-set-up-gmail-in-evolution-gnomes-mail-client-and-organizer/